Saturday, February 19, 2011

This Little Piggy....Bank!


So we have our papier mache - it has dried out and it's time to turn it into a lovely piggy bank.

For this you will need:

Crepe Paper in chosen colour
Eco-glue/PVA glue
1 toilet/kitchen roll cardboard inner tube
Masking Tape

You can use either Eco or PVA glue for this - PVA glue dries harder and faster so we used that. Spread glue on an area of the papier mache. Apply paper strip, adding more glue if needed.

Cut the cardboard tube into one inch pieces - you should get 5 of them. Attach them with strips of masking tape. Four on the bottom for feet, one on the front for a nose.


Cut 5 squares of paper - enough to fit over the nose and feet. A thin layer of glue on the cardboard cylinders and attach:

Cut the paper into strips, 1 inch wide. Layer of Glue on Papier Mache and apply until your pig is completely covered. Attach ears, tail, eyes and smiley face! Get a craft knife and cut out your "money slot":


And now see some of our little Artists at work.....

Lots of Pink Pigs here:

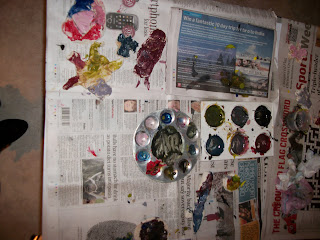
Gluing, sticking, gluing:


A Blue Pig in the making....


Some of the finished Piggies!

Pink....

Pink....

Blue!

The only way to get your saved money out is by cutting your pig OR smashing it...just make sure you've saved plenty of money first!

We will be taking a break from class for mid-term, but will be back in 2 weeks time for some exciting new projects to work on.....join us then!

Monday, February 7, 2011

Eco Glue Recipe

As a child, we used wallpaper paste for papier mache. But Eco-glue is economical and won't harm the environment as some of those pastes or glues can. Wall paper paste can be made with toxic ingredients. Not only does it smell terrible while you are applying it, chances are it will emit harmful VOCs (volatile organic compound) for years to come.

Not very nice to mix up for our crafts!
So...here's the recipe for Eco-Glue

Recipe:
1 cup Flour
3 cups Water

What to do....
Put the Flour into a medium sized saucepan. add one cup of water and stir into a paste with no lumps. Add the 2 more cups of water and turn up the heat. Stir and stir and stir - never stop stirring or you'll get a lot of lumps! Bring the mixture to the boil (when it's bubbling and thick). Remove from heat. Allow to cool.
PASTE STUFF!
The glue does not keep well, so only make as much as you know you're going to use - since it's so easy and cheap to make
I doubled this recipe for 6 kids papier mache projects and it was plenty for us. This glue can be used for other crafts too as it's plenty sticky!

Papier Mache - The "Art" of Recycling


Papier mache is a fantastic way to teach kids about recycling. Or, to use an even newer term "upcycling". Where we take old items, used or "useless" items and turn them into something new and beautiful. A creation! Plus it's sticky, squishy and fun to plonk our hands into!

To make the Papier Mache part of the Piggy Banks.......You will need:
Eco-Glue
Newspaper (in strips about 1 inch wide, length doesn't matter)
Balloon

Before class, I made up a nice big batch of Eco-glue. We will do the gluey Papier Mache part in class this week - wait for it to dry - then turn it into a pig next week.

I also pre-cut the newspaper into strips (to save us some time so we can play some games after!) and pre-inflated the balloons.

We covered a strip of newspaper in glue (either by dipping it into the glue or painting it on with a brush). Placed it on the balloon - repeated this over and over again until the whole balloon is covered.
Then....cover it in another layer.....and another.....3 layers should do it.

Have fun squishing, sticking and pasting - our class certainly did!

And it should look a little like this....

And now we leave it to dry for next week. And we even had some time to make a few Valentines cards too!

The calm after the creative chaos....!

Next week - Watch our Piggy Banks grow legs, a snout and turn PINK!!!

Salt Dough Painted!


And so the objects were baked to perfection - after very slowly cooking for many hours in the "borrowed" Aga.

The kids had great fun mixing the paint colours, and although I explained that blue and yellow make green, white and red make pink - all the colours eventually mana
ged to turn - as they do - mainly brown.


But it was all about the fun and learning. I actually loved to hear the children's delight as they mixed the colours together to see what they turned into. Next time we paint, I'll make a colour chart so that they can follow that.

Paint got on hands, noses and luckily, mostly on the old shirts I had brought with me for the children to wear to protect their clothes.


We added pieces of coloured wool and twine to the things we wanted to hang up, such as our nameplates and decorations.


Nameplates for bedrooms:


Some Decorations:

A Door Hanging Decoration....

And one that makes me smile.....A little grey sheep.....awwww....

And some pretty snazzy jewellery too.....

Everyone did such a great job at finishing up, that we had enough time for some favourite games, such as taking it in turns to tell each other how wonderful we are and finding out what makes us feel happy or sad. We finished off by singing a few songs, "If you're happy and you know it" is one that really gets everyone excited - even me!

Next week, we will be making Papier Mache piggy banks. We will even be using "Eco-glue" - glue that doesn't harm the enviroment. Bet you never thought about that one before?!
Tune in for the Eco-glue recipe and instructions for making the piggy banks with your kids at home.